|
|
Post by doveman on May 20, 2012 8:25:11 GMT -7
I am familiar with setting bias (and the dangers within). I built a Brown Note D'Lite 22/33 but part of the installation included bias points and bias pot that I could get to from the back of the amp. I had a 5U4 rectifier tube handy and plugged it in in place of the 5A4 and it seemed to soften some of the "hardness" I mentioned on the amp. It also dropped the volume a bit. So I'd like to experiment with it and rebias. I think the bias pot is on the board inside the amp, but anyone want to give me the process before I take the amp out and start fooling with it? Thanks in advance  |
|
|
|
Post by doveman on May 20, 2012 10:44:35 GMT -7
Finally got the chassis out ... man those bolts were tight! Anyway ... beautiful work in this amp ... simple and clean. Here's a picture of the area including the power tubes and the bias pot. I also can see pin 3 on the power tubes. So I can do the calculations from the voltage on pin3. My questions: (1) Assuming this is the bias pot ... lower right (2) Where would I take the measurements that I would normally get off the bias pins (in millivolts on my amp) (3) Are the measurements converted to millivolts?  I don't mind learning how to do this right on this amp and will be careful. So teach me ... please. |
|
Deleted
Deleted Member
Posts: 0
|
Post by Deleted on May 20, 2012 11:43:11 GMT -7
I hope this helps. I would use the red/white striped wire coming off the bottom of the blue filter cap which is on top of the amp for the shunt readings. The safest way would be to purchase a bias probe. If you touch one of the leads when taking the mA measurements, you will get hit by all 450-470 volts. For instance, if you happen to drop one of the probes onto you leg while wearing shorts, ZAP. www.duncanamps.com/technical/lvbias.html"THE OUTPUT TRANSFORMER SHUNT METHOD This is the way many pro techs measure plate current. A *good* quality DMM is required for this measurement. (When it comes to good DMMs, you have three choices...Fluke, Fluke, and Fluke.) This section assumes that you know a bit more about your amp, and how to use your testgear. If any of it is unclear, DON'T TRY THIS. NOTE... Marshall amps have output transformers which have a very low DC resistance in the primary winding. If your meter's internal current-measuring shunt resistor is a relatively high value (~ 10 ohms, for instance) it will induce significant error into a transformer shunt measurement. This is because when such a meter is connected in parallel with half of the output transformer's primary, a significant portion of the current is not flowing through the meter, and can't be read. For this reason, unless you're *sure* you have a meter with a low internal current-sensing resistor (~ 1 ohm) the shunt method is *not* recommended for use on Marshall (and other low DCR) output transformers. Fairly good results can be achieved on Fenders, though.
WHAT YOU WILL DO
A) Read the current flowing through each leg
of the output transformer's primary.
B) Read the plate voltage.
C) Use the above readings to calculate the
static dissipation wattage.
D) Adjust the bias to obtain the best tone,
while keeping the tubes within specifications.
For this particular reading, you'll need to change your test leads to the CURRENT input jacks, and select the 200 mA DC range. The two probes are applied to the center tap and either of the ends of the output transformer's primary. (On a Fender, for instance, the center-tap is RED, and the two plate wires are BLUE and BROWN. On a Marshall, the center tap is usually BROWN, and the plate leads are usually RED and WHITE.)
On some amplifiers, the easiest way is to put one probe on pin THREE of either socket (or of either of the two sockets on each side) and the other on the center-tap, which will be located at some distance from the socket. Some amps (like the Marshall JCM 900 series, for instance) have all the wires soldered to terminals on the bottom of the output transformer, conveniently sticking up right where you can reach them.
The current that would normally flow through half of the transformer's primary winding is "shunted" through the meter, and thus measured. A small amount still flows through the part of the winding you are shunting, but the transformer's resistance is much higher than your meter's internal resistance. (See "NOTE" above.) Nearly all of the current flows through the meter.
SAFETY ADVISORY
BE WARNED...for all practical purposes, a meter set to measure CURRENT is equivalent to a STRAIGHT WIRE. This means that as soon as you touch either probe to the high voltage circuitry, THE OTHER PROBE NOW CARRIES THE SAME VOLTAGE. If you drop the probe and it lands on your arm or leg, you could be electrocuted. If it lands on the chassis (or anything else that is at earth or circuit ground potential) a huge spark will be generated, along with a noise like a small firecracker. (Please don't ask how I know this. ;-) The probe tip will be partially melted, and at the very least, the meter's internal fuses will blow. At worst, the meter will be history. Shorting the HV to ground isn't especially good for the amp either, and may blow the amp's fuse or damage the circuitry. You can easily kill a rectifier tube this way. BE ESPECIALLY CAREFUL NOT TO LET A PROBE SLIP OFF A TERMINAL AND HIT THE CHASSIS WHILE YOU ARE TAKING A READING! BE *EXTRA* CAREFUL TO MAKE SURE YOUR FINGERS DON'T SLIDE DOWN THE PROBE AND COME INTO CONTACT WITH THE METAL TIP!! And make DOUBLE damn SURE you know which two points in the circuit you are supposed to touch the probes to, because if you accidentally touch the bias supply and the plate supply at the same time, you won't *believe* what happens. IF YOU'RE NOT *SURE* WHAT TO PROBE, *DON'T* PROBE IT!!
Once you've obtained the current readings from both sides of the output transformer's primary, you'll need to take a plate voltage reading so you can calculate the static dissipation wattage (as outlined above in the CATHODE RESISTOR method) and decide whether you need to increase or decrease the plate current. Note that if you are using the OPT shunt method with an amplifier which uses more than one tube per side on the transformer, you will need to divide the current reading on each side by the number of tubes used. Example: you read 88 mA on one side of a Twin Reverb's output tranny; that's 44 mA per tube, since there are two on each side. (4 total.)
REMEMBER TO REMOVE THE TEST LEADS FROM THE CURRENT MEASURING JACKS, AND TO SET THE METER TO THE HIGHEST DC VOLTAGE RANGE BEFORE YOU TRY TO READ THE PLATE VOLTAGE!! If you attempt to read the plate voltage with your meter still set up for a current reading, the results will be spectacular (as outlined above.) Since you may need to take several plate CURRENT and several plate VOLTAGE readings before you are finished setting the bias, you will need to be extremely vigilant about changing the meter settings (and the test leads) each time you take the different readings. Most pro techs use TWO METERS for this procedure, leaving one set up for current and one for voltage. (I use a handheld meter for the voltage reading, and a bench meter for the current.)
Once you have the necessary readings, the procedure is the same as for the CATHODE RESISTOR method: read, multiply, listen, adjust, read, multiply, listen, adjust, read, multiply, etc. Don't neglect the "settling" period, either. BE CAREFUL!!TYPES OF (FIXED) BIAS CIRCUITS Many amps which use "fixed" (negative grid) bias have provisions for adjusting the negative grid voltage upward or downward. Making the grids LESS negative will cause MORE current to flow through the tubes. Some amplifiers don't have a bias-adjusting control (pot) but instead use a fixed resistor to set the voltage. If you encounter one with a fixed resistor, the best thing to do is convert it to an adjustable type. Most of the time, the fixed resistor will be in parallel with the bias capacitor; the lower this resistor's value is, the lower the bias voltage will be. If you can locate and identify this resistor, you can replace it with a simple network consisting of a (lower value) resistor in series with a potentiometer. What you'll be shooting for is a range of adjustment that goes from LESS voltage to MORE voltage than is set by the (existing) fixed resistor. Take the value of the fixed resistor and divide by two; pick the closest standard value to your result, and put it in series with a pot which is as close to the original resistor's value as you can find. Example: the existing resistor is 33K; use a 15K resistor in series with a 25K pot to replace it. The original resistor was 33K; you now have the ability to adjust the value from 15K to 40K. This should provide you with sufficient adjustment range to set any plate current you wish. If not, use a different value pot or resistor. Some amps have a "balance" type bias adjustment, which allows you to vary the negative grid voltage between the two halves of the output stage; this makes a "matched" set of tubes less crucial to good performance, although it can't compensate for tubes that are wildly different. If you encounter this circuit, the easiest way to adjust it is to simply "tune" the control for minimum 120Hz hum on the output. This type can be modded to the *best* type, which is not only variable from side-to-side, but adjustable up-and-down, too. Usually, this circuit will have the "balance" pot's wiper connected to a resistor which is grounded at the other end. You can replace this resistor exactly as outlined above (half the value, add a pot, etc.) and have the best of both worlds. If the simple mods outlined above (and the reasons for making them) don't seem perfectly clear to you, DON'T TRY THEM. A schematic (and the expertise with which to interpret it) will go a long way towards helping you do them correctly. You can have the mods performed by a tech, and then do your own biasing from then on, if you wish." |
|
|
|
Post by doveman on May 20, 2012 12:00:52 GMT -7
Apparently, I'm used to using the CATHODE RESISTOR METHOD rather than the SHUNT METHOD. I'm not sure that I want to try this more dangerous method without knowing a bit more ... or seeing it done. But at the same time ... I'm liking the way this new 5U4 tube sounds ... knowing it has not yet been rebiased.
Is there a video or shows this SHUNT METHOD? Or is it worth installing bias points maybe? I'm not aware of a good tech in this area ... I'd like to be able to do this myself.
Any advice? Should I just buy the bias tool ... I'm guessing this is the sockets that fit in between the tube sockets and the tubes and connect to the meter. I'm going to hunt for those now. Any recommendation for these units?
|
|
Deleted
Deleted Member
Posts: 0
|
Post by Deleted on May 20, 2012 13:19:16 GMT -7
|
|
Deleted
Deleted Member
Posts: 0
|
Post by Deleted on May 20, 2012 13:20:43 GMT -7
You still need to open the amp and take plate voltage readings. At least that's how my bias tool worked. It is a groove tube bias probe.
Correction. Those readings can be taken off the top of the socket using the correct pins.
Sorry about that.
|
|
Deleted
Deleted Member
Posts: 0
|
Post by Deleted on May 20, 2012 13:25:17 GMT -7
Opening the amp to access the bias pot is pretty much a must.
|
|
|
|
Post by KeithA on May 20, 2012 16:47:22 GMT -7
As I said earlier, Komet & Reinhardt have a method that is great. Here the chassis-top mounted bias adjustment knob...  and here's the back of the chassis with test points (the bias adjustment knob can be seen in the upper left)....  This would be great on all amps that require bias adjustment (no matter how few times bias needs to be adjusted over the life of an amp). Keith |
|
|
|
Post by doveman on May 20, 2012 17:13:27 GMT -7
This is how I did it on the amp I built. The bias points are on the back and for the adjustment ... insert a screw driver into the pot located near the transformer on the right ... never need to take the chassis out.  Nice ... I think I could do something like this inside though by simply lifting the ground from the tubes and connecting it to a strip then mounting the strip inside the amp on the same hole the tubes had been ground to to begin with ...  The 1 ohm resistors (1% variance) would allow the CATHODE RESISTOR METHOD as mentioned above and in my amp. I don't mind taking the chassis out and don't really want to start taking components off the board. I could measure the voltage off pin #3 of each power tube and then measure the bias while adjusting the pot on the board. Simple and it would look ok I think. I could also put it back to it's original state easily. |
|
Deleted
Deleted Member
Posts: 0
|
Post by Deleted on May 21, 2012 8:51:40 GMT -7
I like getting in there and playing around. I know just about enough to be dangerous. I had no reason to open my Maz 38, so I didn't. My current amp is cathode biased so there is no reason to open it either.
doveman - I had something similar (to the pic above) done to my Route by a local tech. I pulled it out and used the shunt method. He didn't like the fact that the red/white wire I was using to take my measurements had other stuff connected to it. I thought it worked pretty well though. I only blew up the 20 amp fuse in my meter a couple of times. And got the full 470V once by accident.
Also gave my wife a scare once. Was just joking around, but I thought she was going to kill me after she discovered I hadn't died from electrocution.
|
|
|
|
Post by DRZ on May 21, 2012 12:46:00 GMT -7
As I said earlier, Komet & Reinhardt have a method that is great. Here the chassis-top mounted bias adjustment knob... and here's the back of the chassis with test points (the bias adjustment knob can be seen in the upper left).... This would be great on all amps that require bias adjustment (no matter how few times bias needs to be adjusted over the life of an amp). Keith Yes that is a nice feature. But also why a RT 66 costs $1700, and a Komet 60 costs $3700.00, and a Reinhardt is out of business . Great for a feature that might be used once every couple of years tops. DR.Z |
|
|
|
Post by doveman on May 21, 2012 13:01:56 GMT -7
Yes that is a nice feature. But also why a RT 66 costs $1700, and a Komet 60 costs $3700.00, and a Reinhardt is out of business . Great for a feature that might be used once every couple of years tops. DR.Z I'll give you that ... I only use mine about once or twice a year ... mainly because I occasionally change tubes between 6L6 and 6V6 occasionally. It would be nice to have a safe easy way to adjust the bias for this new 5U4 rectifier without taking it to a tech. I don't really want to try the shunt method ... don't really understand it even. I don't even mind taking the chassis out occasionally if there were some points to measure with the 1-ohm resistors. Nice simple amp though ... so I guess anything would start making it complicated. |
|
|
|
Post by KeithA on May 21, 2012 14:57:32 GMT -7
As I said earlier, Komet & Reinhardt have a method that is great. This would be great on all amps that require bias adjustment (no matter how few times bias needs to be adjusted over the life of an amp). Keith Yes that is a nice feature. But also why a RT 66 costs $1700, and a Komet 60 costs $3700.00, and a Reinhardt is out of business . Great for a feature that might be used once every couple of years tops. DR.Z Doc In all fairness, I can guarantee you that the reason that a Komet costs $3,700 is not because of the implementation of these external test points and adjustment knob. Same goes for the reason that Bob is no longer is business, it's not because of offering the external test points but rather because he decided to take the opportunity to manage a Pro Stock racing shop in Colorado. I respect that you do not want to put this is the Z line for whatever reasons, but to infer the above items is just not accurate, IMHO. I wave the Z flag as proudly as anyone, with 4 in the house as we speak and a Route 66 being built now. I'm not saying the Route 66 is any less of an amp for not having the options like the Komet or the Reinhardt, just that it would be great if it did. Keith |
|
Deleted
Deleted Member
Posts: 0
|
Post by Deleted on May 21, 2012 15:04:23 GMT -7
|
|
|
|
Post by DRZ on May 22, 2012 7:35:33 GMT -7
Doc
In all fairness, I can guarantee you that the reason that a Komet costs $3,700 is not because of the implementation of these external test points and adjustment knob. Same goes for the reason that Bob is no longer is business, it's not because of offering the external test points but rather because he decided to take the opportunity to manage a Pro Stock racing shop in Colorado.
I respect that you do not want to put this is the Z line for whatever reasons, but to infer the above items is just not accurate, IMHO.
I wave the Z flag as proudly as anyone, with 4 in the house as we speak and a Route 66 being built now. I'm not saying the Route 66 is any less of an amp for not having the options like the Komet or the Reinhardt, just that it would be great if it did.
Keith
[/quote]
Keith I do appreciate your support of Z-Amps, and this wasn't meant as any type of personal confrontation. But let me clarify a few facts, and understand I have a bit of experience in designing and building amps.
I do read this forum and look to it for suggestions and new idea's to make my products better.
Yes the adj. bias pot isn't the only reason Komets cost so much.
But that is a VERY expensive Precision turn counting dial/locking pot assembly with a unit price of $77.60 USD. And that is only one part of the circuit, precision high wattage 1 ohm resistors, and banana type female jacks. So all in all it would add approx $100.00 to the parts cost and if you use the 5X rule of parts to RETAIL price it would increase the cost $500.00. Now to me that is a large increase for a feature that is not used very much. A descant Bias Probe is less then half that cost and can be used on many amps with the same results sans having to pull the chassis.
I could mention many more reasons the Komets have such a high retail cost , but I will take the high road.
As for Bob R yes he is following another passion , but amp building isn't a way to make to make a great living, at this time, with this economy, unless you are very well established. Just making a great amp isn't enough these days to have a successful business.
And finally just having a cheaper exposed bias pot leads to it being bumped and mis adjusted, causing poor operation ( i.e. mis biased ) or failure from cherring output tubes.
Also UL/ETL does not allow serviceable adjustments to be made by what they consider unqualified users. Z-Amps would then not qualify for CSA certification and would not be sold legally in Canada.
Honestly Keith I look at all ways to make my amps more user friendly, but as an engineer I do draw the line. I hope you except my explanation in the good faith that I have tried to define it, without stepping on too many toes.
DR.Z
|
|
|
|
Post by John on May 22, 2012 8:05:45 GMT -7
I suppose there are those of us who've purchase 'boutique' amps who will take the extra mile and bias our amps. (where needed) But I really thing for most people, they just shove a new set of tubes and off they go.
When I had my Route 66 & Z-28, I set the bias when I got the amp, put it back in the chassis, and never gave it another thought.
Less amp tweaking....more playing.
(except the Doc...KEEP TWEAKING!)
|
|
|
|
Post by prspastor on May 22, 2012 13:08:43 GMT -7
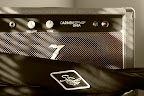
Here is a similar solution to what doveman was describing above. This is a shot of one of the power tube sockets in an Express I'm building right now. Notice the 1 ohm resistor coming off pin 8 to a ground lug? If you clip your multi-meter to either side of that black resistor and take a voltage reading, you are good to go.  |
|
|
|
Post by doveman on May 22, 2012 14:40:23 GMT -7
awesome ... that would work too ... still pretty close to the business end of things but had not seen it done that way. Also, here is the best describption I think I've seen on the "shunt method" and has a couple of dangerous steps in it. www.marstran.com/50W%20Bias.htm I think the 1-ohm method would be close enough for me. So still thinking about doing the 1-ohm deal. I also agree ... more playing and less tweaking is good ... but I do a lot of both. Especially when I get a new piece of gear. But once I get it dialed in ... then I'm happy. Almost every tweak I've made has gotten me closer to the sound in my head. My other two amps are just about perfect for their flavor (Tweed and ODS). Now I'd like to get this one right for me (Z Baby!). |
|
|
|
Post by prspastor on May 22, 2012 20:15:27 GMT -7
I just thought of something doveman. Dr. Z star grounds his amps so the solution I posted above won't work well on a Route 66. You'll mess up Doc's grounding scheme. You would have to figure out a way to install a 1 ohm resistor for each grounding leg off of pin 8 prior to the ground nut - I think your idea earlier in the post would be the most professional way of doing it and it would be reversible. You could do it with an isolated tag strip.
I bias my Route 66 via shunt method, but I'm pretty comfortable crawling around the insides of amps and I've got a really good meter that will handle such tasks. (Fluke) I would say that you won't have to bias your amp too often enough to do any mods. You are looking at thousands of hours of use on those KT66s - years and years IMO. I'd find a bias probe and just go with that. You won't use it too often I would think.
Enjoy that Route 66 - perfect complement to an ODS.
|
|
|
|
Post by doveman on May 23, 2012 22:36:28 GMT -7
Ok ... I disconnected the two green wires coming from pin 8 of each KT66 (grounded together to the chassis) ...  And replaced it with 1-ohm resistor contraption that I described in in earlier post. Totally reversable. They did not have 2 watt 1% resistors. They loaned me a nice meter to check a bunch of the 5% resistors looking for two that were exactly 1-ohm (I looked through many).  The pin #3 voltage was 462V DC. By my calculations for the KT66 (25w * 70% dissipation) / 462V = 37.8 mA. I used my meter to target 37.8mv off this new device. It was a bit lower than that ... like 32mv. I was not able to "crank her up" tonight but will tomorrow. Hopeful ... but who knows. Just for info, I also dropped in the 5U4GB. The voltage dropped to 440V DC. Redoing the calculations ... (25w * 70% dissipation) / 440V = 39.7 mA. I found that I could not dial in the bias pot that high. Does that sound right? I took the 5U4GB out and put the original rectifier back in. Perplexed by this ... what has anyone else experienced? Could you dial in the recommendation? Would it work lower ... I think it was in low 30s at best ... which would be about 55% dissipation? I'll probably swing by the parts supply again. I think I'd like to see if they have any 1w 1-ohm 1% resistors. They would work too and I'd still think these 2w are slightly off. |
|
|
|
Post by prspastor on May 24, 2012 5:58:27 GMT -7
You probably have some fairly cold tubes... Thus the problem in getting them up to proper dissipation. Next time you buy KT66, ask for a higher groove tube rated tube - ex. go from a 5 to a 7.
(From Myles' website)
In a amp with a given bias, a higher GT rated tube will have a higher idle dissipation if no adjustments are made.
This aspect can be used to fine tune amps such as older tweed era Fender amps, Mesa Boogie Amps, Hiwatt,
Orange, etc. If you find as an example that a #5 tube has an idle of 26mA and you wish something closer to 30mA
you may want to try a #7 rating.
Doc recommends (and I think Myles too) about 60% dissipation on this amp. If you have your 5U4 in there with 440 plate volts, you should be looking at 34ma. You could warm it up to 36ma if you like that flavor a bit better. Doc's specific recommendation is 36ma.
|
|
|
|
Post by doveman on May 24, 2012 6:16:00 GMT -7
The KT66 I have are Groove Tubes with a #5 rating ... I was thinking about some Gold Lion and some tube rolling ... have a set of backups. The #7 Groove Tube KT66 might be a good option.
What is the "myles website"?
|
|
Deleted
Deleted Member
Posts: 0
|
Post by Deleted on May 24, 2012 8:46:03 GMT -7
Myles Rose's web site: www.guitaramplifierblueprinting.com/index2.htmlIn the upper right hand corener, above his pic, is a great tool for helping with bias calculations. It's an excel sheet he made up. Just type in the voltage and the tubes, press enter and wallah, you have the target mA in a safe range. |
|
|
|
Post by doveman on May 30, 2012 17:28:27 GMT -7
Update: Mouser order came in ... ordered some Vishay 2w 1-ohm 1% resistors and reinstalled to replace the 5% resistors that I hand selected. The others weren't far off, but I feel a bit better about it. New pics:   The install was a bit cleaner too. |
|